API 579 Part 9 Crack Assessments
INSPECT’s Part 9, Level 1 and Level 2 assessments quickly determine which crack-like flaws can be safely left in service and which require more investigation. Part 9, Level 1 is a conservative screening assessment. Because of this, only minimal data entry is needed to perform the assessment. With INSPECT, you model the component the crack is on, enter the crack’s description and press F3. If INSPECT determines that a Level 2 assessment is needed, simply switch to the Level 2 option and enter the additional Level 2 details.
Although simple to use, INSPECT’s crack assessments are in compliance with all the requirements of API 579-1 Part 9. For instance, crack assessments often require a Part 3 (brittle fracture) screening which INSPECT performs automatically. If the crack is out of plane, INSPECT determines the equivalent crack length for you.
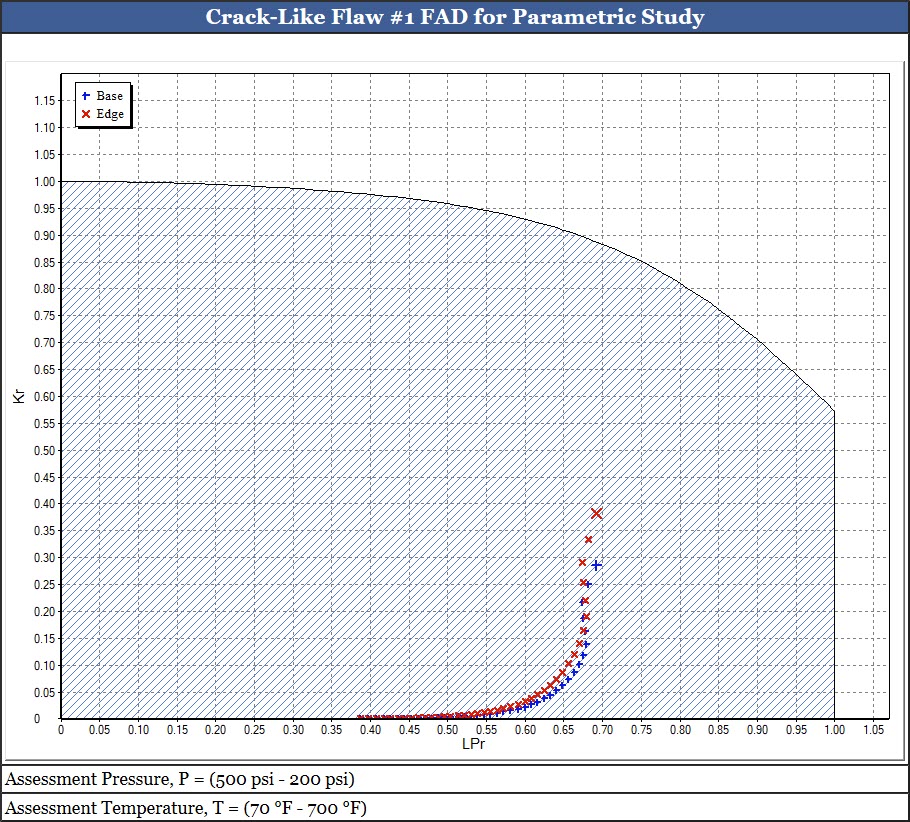
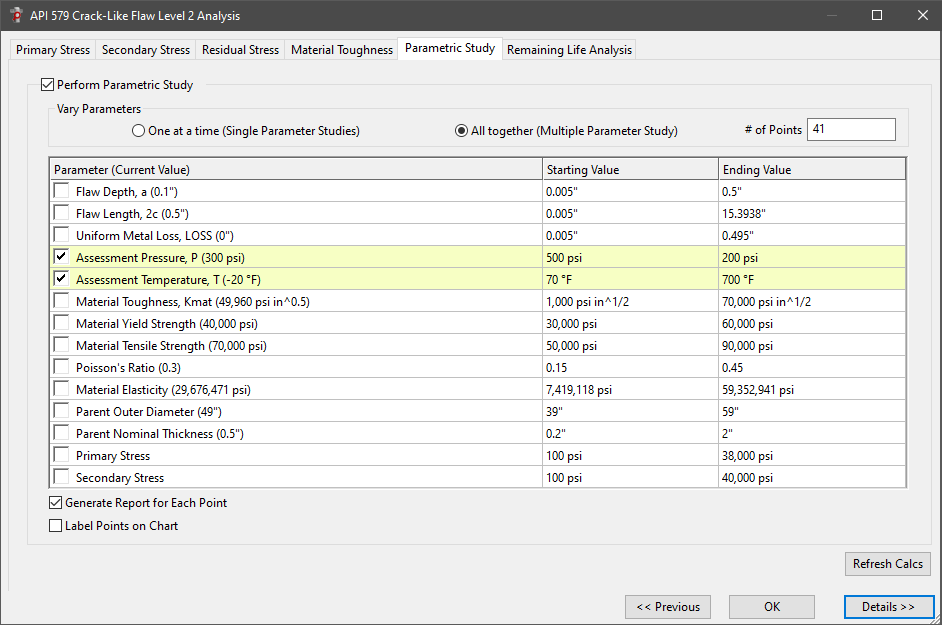
Parametric Study of Crack-Like Flaws
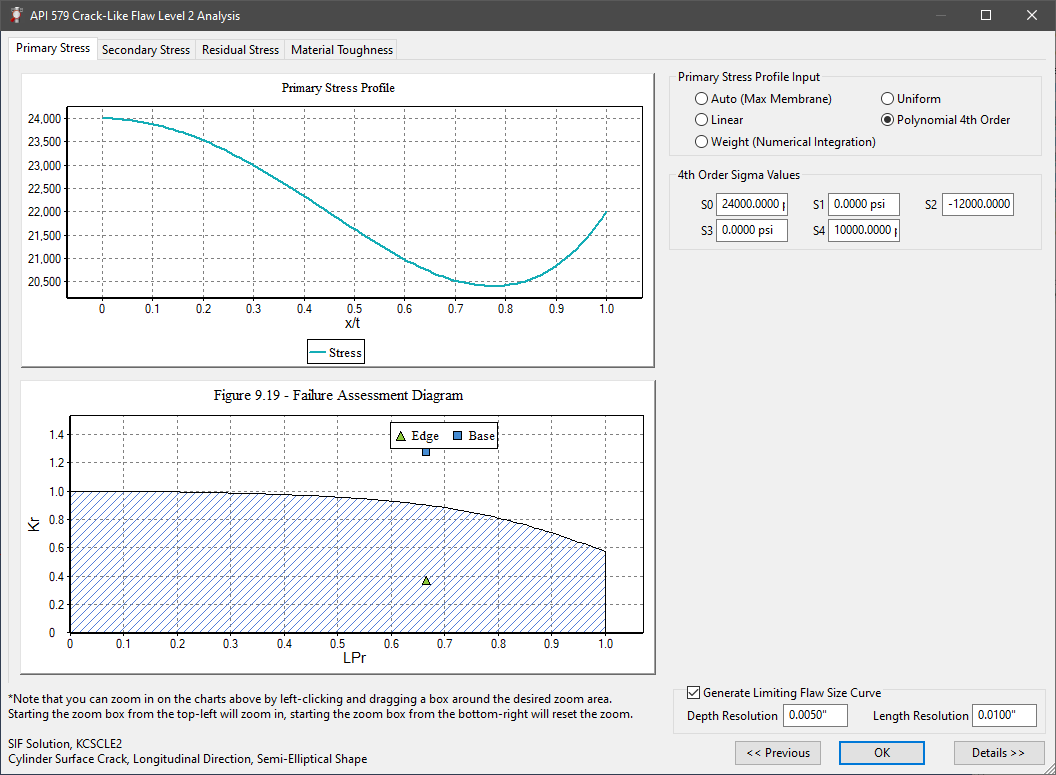
INSPECT offers a powerful Parametric Study option for cracks that allows interactions with one or more parameters. Engineers can quickly perform sensitivity analysis studies based on iterating selected parameters such as pressure and temperature. Another important use for this capability is to investigate how the crack analysis is affected by uncertainties in inspection and material data inputs. Real time feedback is available via a Failure Assessment Diagram (FAD) shown next to the input dialog.
Complete supporting calculation reports provide an audit trail for the parametric study performed. Options to generate reports for each point on the FAD are available.
The FAD and Primary Stress
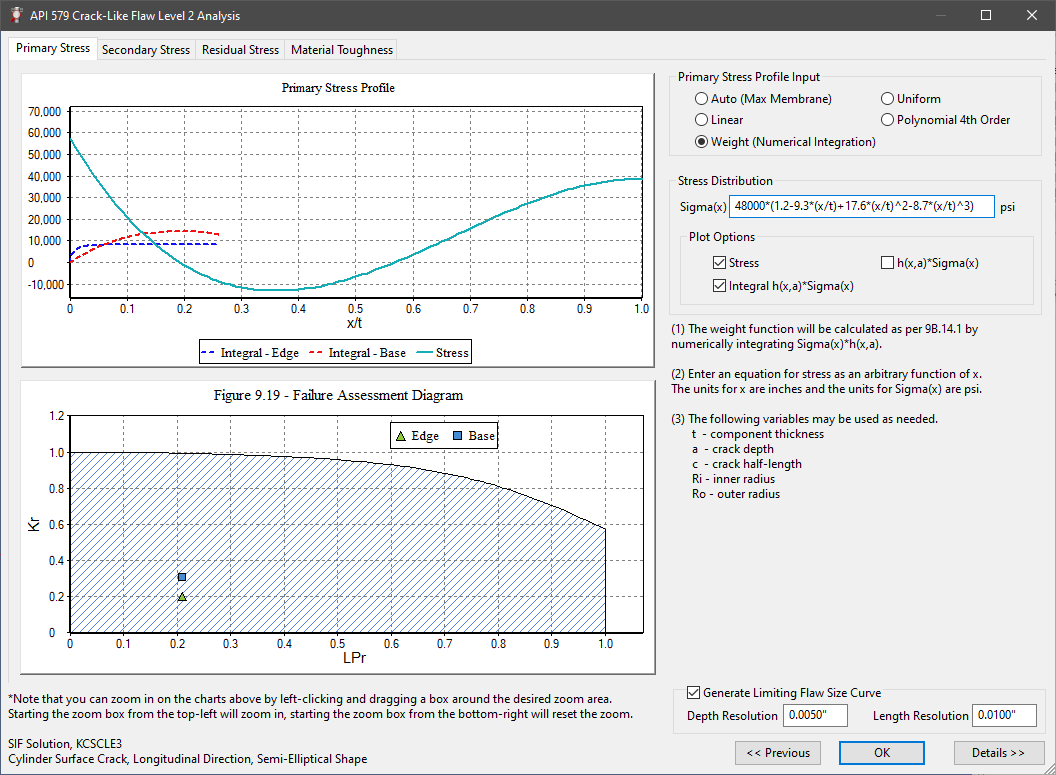
Primary stresses are those stresses required to satisfy the laws of static equilibrium. They are not self limiting, that is they are not relieved by local yielding or by limits to thermal growth. When performing crack assessments, primary stress affects both the Kr and LPr values from the FAD. As a result, changing primary stress affects the placement of results on both the X and Y axis on the FAD.
INSPECT includes the COMPRESS ASME calculation engine. One benefit of this is that primary stresses are determined using the equipment’s Original Code of Construction. INSPECT contains a database of Older Codes to help evaluate older equipment as well.
INSPECT offers a selection of methods for including primary stress in a Level 2 assessment. Engineers can choose from Automatic Stress Determination as well as user defined Linear, Uniform, Weight (Numerical Integration) and Polynomial stress distributions.
INSPECT automatically determines supplemental loads for cracks orientated in the circumferential direction. Engineers may also override this and specify their own supplemental loading. This is also beneficial for cases where a simple component is modeled and external loads such as Wind or Seismic need to be considered.
The FAD and Secondary Stress
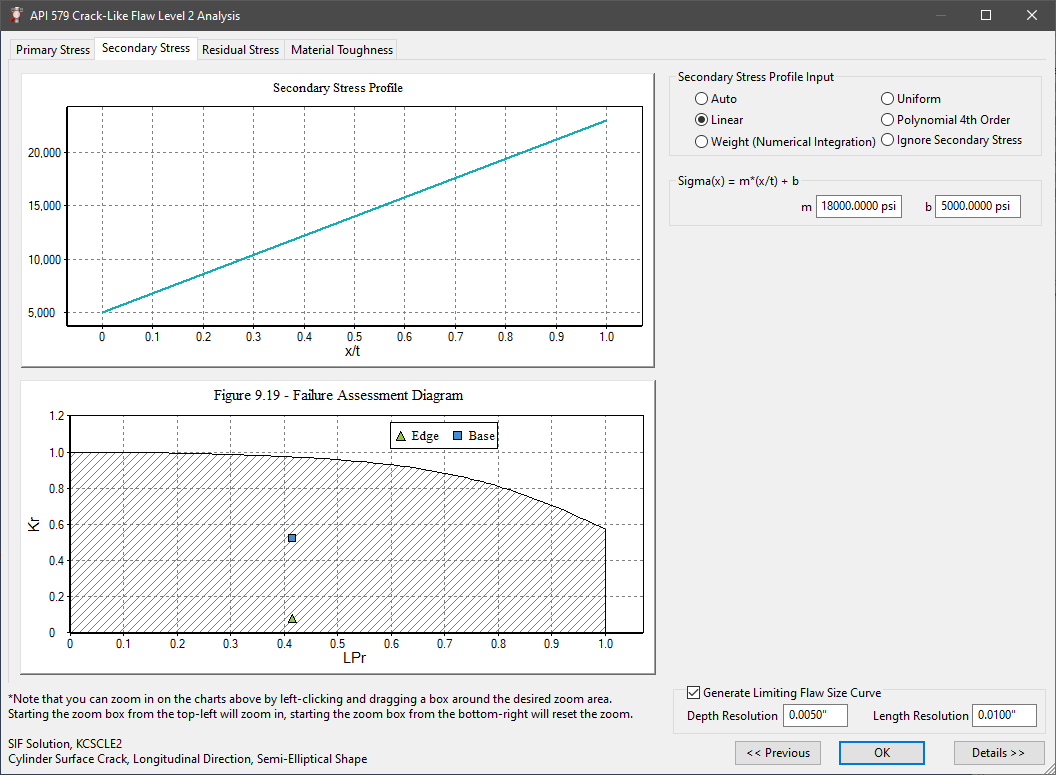
Secondary stresses are often called “self-limiting” stresses. They are typically caused by thermal gradients andor local geometric discontinuities. Because they can attain large values, secondary stresses often drive crack formation and growth. INSPECT’s interactive FAD quickly shows how including secondary stresses in the assessment affects the analysis. Secondary stresses impact the value of Kr resulting in vertical movement (Y axis position changes) on the FAD.
Secondary stress profile options include Automatic, Linear, Uniform, Weight (numerical integration) and 4th Order Polynomial.
In addition, if it has been determined that secondary stresses are negligible an option is provided to remove them from the assessment.
The FAD and Residual (Weld) Stresses
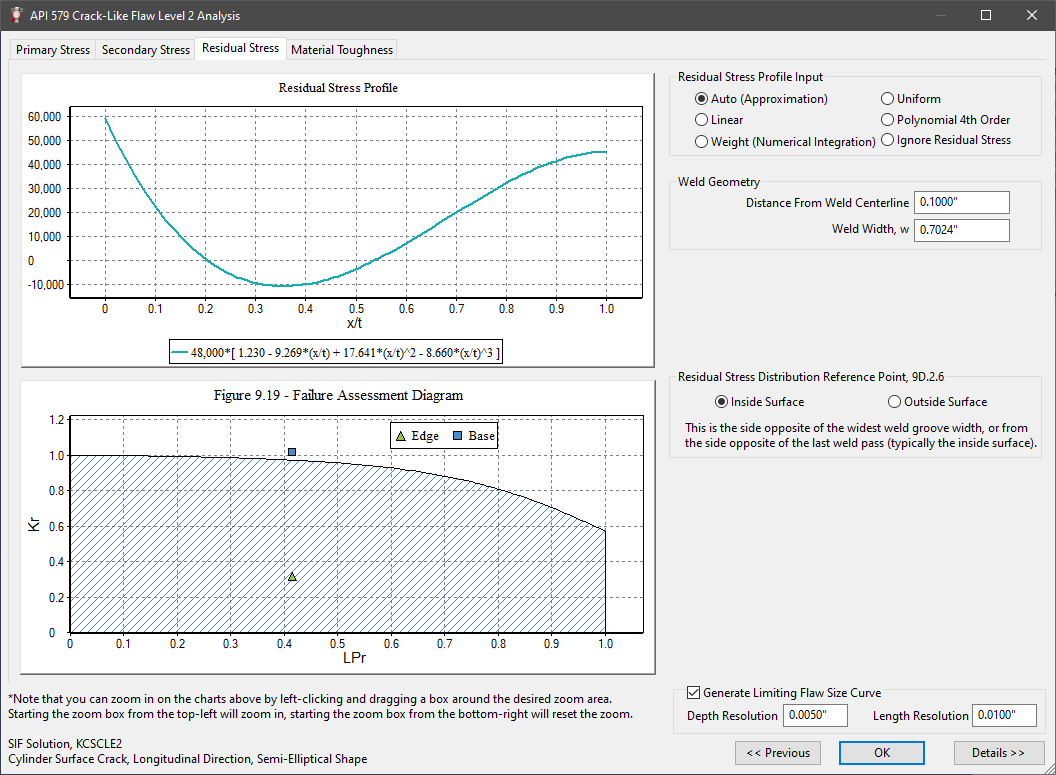
Residual stresses are stresses that remain in a welded joint after fabrication. If PWHT was not performed residual stresses are something that must be considered. Even in the absence of external loads or thermal gradients residual stresses can be a contributing factor in equipment failures. Since residual stresses are categorized as secondary they affect the Kr (X-axis) result location on the FAD.
INSPECT utilizes the method found in API-579 Annex 9D when determining residual stresses.
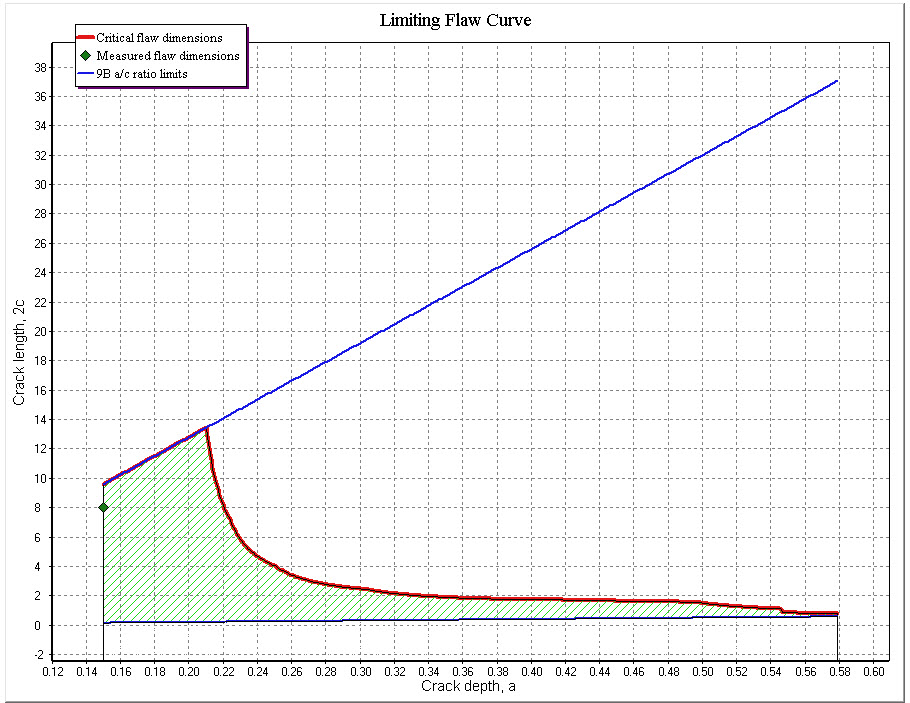
Limiting Flaw Curve
An important step in assessing Crack-Like flaws is determining the crack’s Limiting Flaw Curve. INSPECT automatically generates a chart showing the Critical Flaw Dimensions and where the crack being assessed falls on the chart. INSPECT creates this chart by iterating the API 579 Part 9 calculations and plotting the results. INSPECT performs this calculation intensive operation quickly saving time and effort.
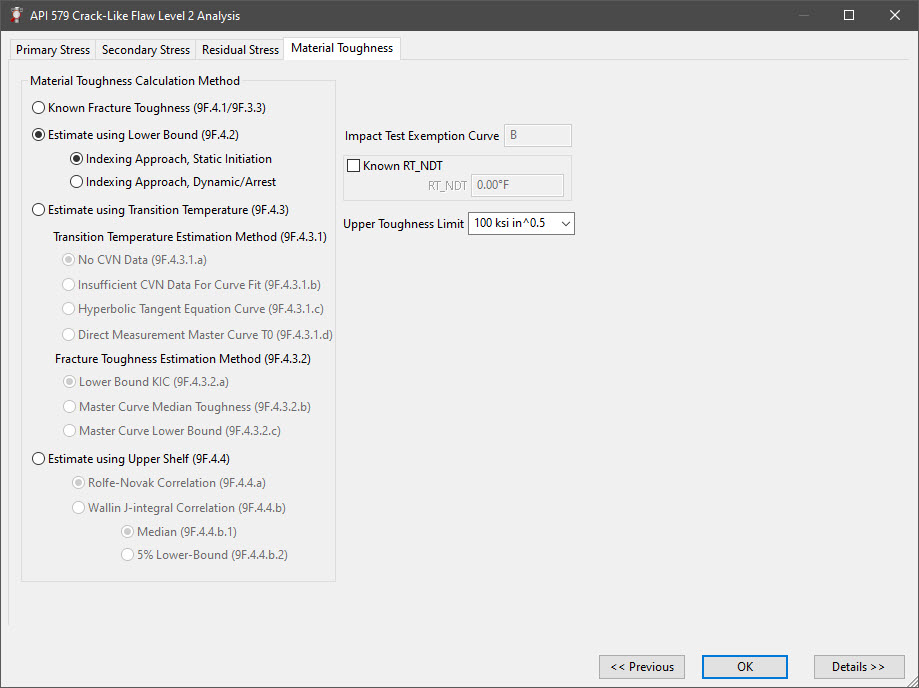
Part 9 Material Toughness Options
INSPECT provides a variety of options for performing Material Toughness evaluations. You may choose from Lower Bound Estimation (Indexing Approach), Estimation using the Transition Temperature and Estimation using the Upper Shelf. In addition, Known Fracture Toughness values, if available, may be entered directly.
Detailed Part 9 FFS Reports
INSPECT quickly creates professional, easy-to-read FFS reports. With the click of a button INSPECT generates detailed Part 9 assessment reports. The reports also include any necessary supporting calculations, such as original Code of Construction or wind & seismic equations as well.
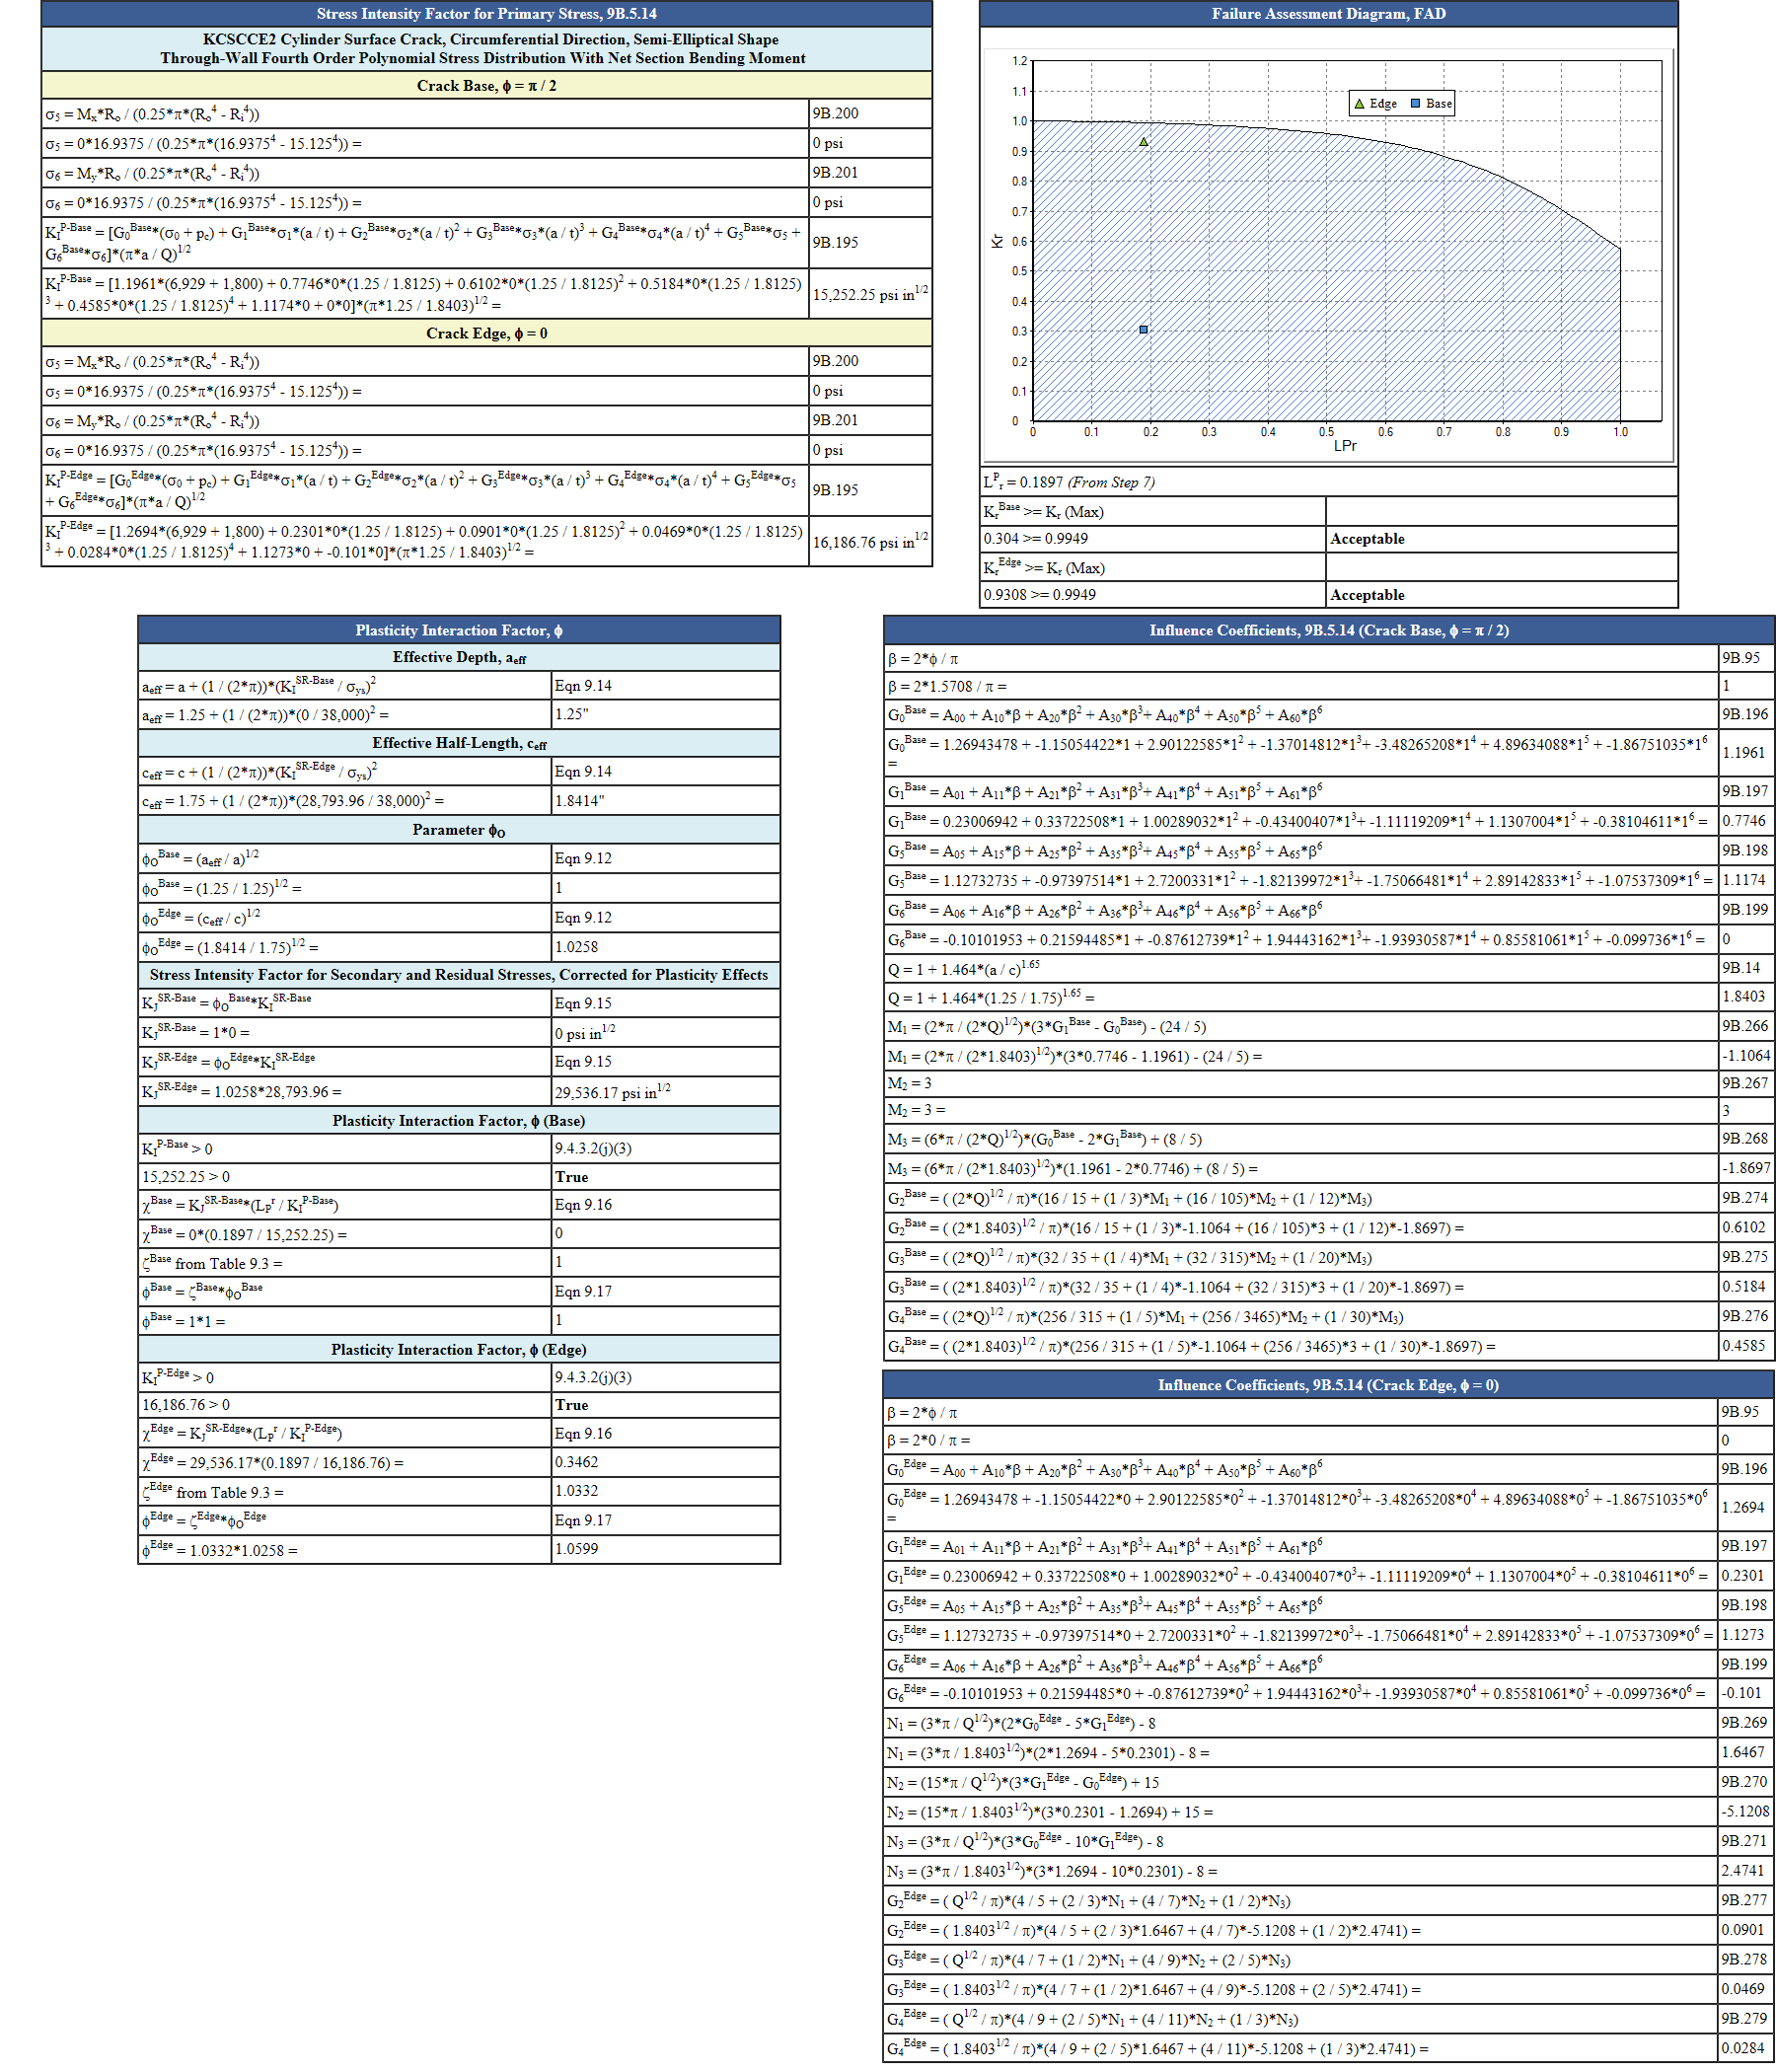
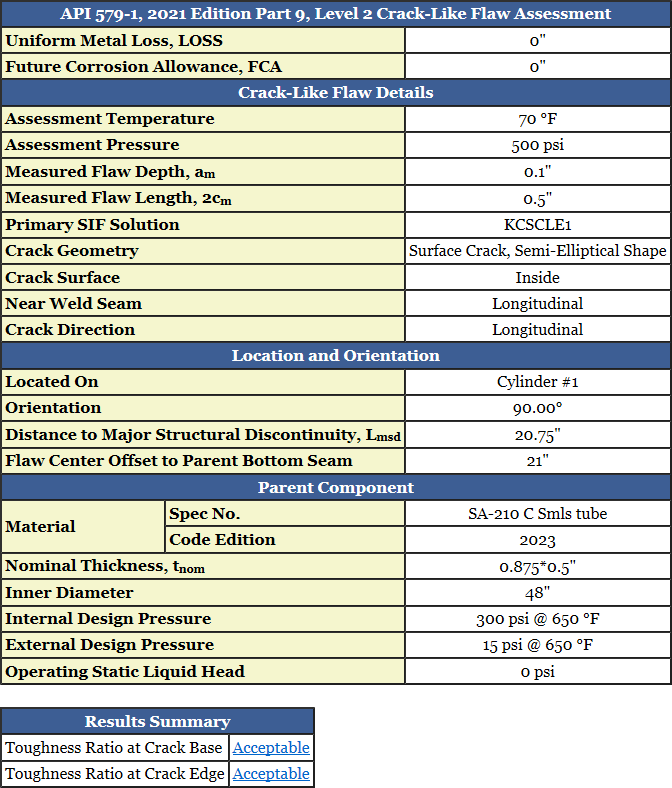
Performing a Level 2 Crack-Like Flaw Assessment with INSPECT

+1 (941) 927-2670 | sales@codeware.com